My re-booted 1970s Carthaginians and Persians have seen tabletop action for the first time this year, and not just once but twice so far! I thought I'd take the opportunity to share the in-game pictures and offer a few observations on how things worked out.
The two armies are not exact historical contemporaries, of course, but they are close in terms of an 'ancient' wargame. They would certainly have been matched against each other when these figures were first marketted in the early 1970s. Anyone old enough will know that anything 1000BC to 1000AD was considered fair game back then. No-one blinked an eye to see Assyrians taking on Byzantines, or Vikings giving Classical Greeks a sound beating. In my case, the Carthaginians may be assumed to represent an army of the Second Punic War (218-204 BC) whilst the Persians are contemporary opponents of Alexander the Great (334-331 BC).
 |
| The Persian army - how can Darius possibly lose! |
 |
| The Carthaginians - what no elephants! Hannibal is disappointed. |
For our first outing I got together with Jervis Johnson. Nostaligic memories of fighting games using the old Wargames Research Group (WRG) rules swayed us to attempt a game using a version contemporary with the actual models. And here are the rules we settled upon - the Wargamers Research Group Ancient rules 1000 BC to 1000AD, 3rd edition but updated and clarified as per the 4th edition. WRG rules were frequently amended between editions. This was achieved by sending a self-addressed envelope and receiving an update sheet, which you either cut and pasted in place or you wrote in the changes by hand. Hence, the half-way house between editions, and this is how you usually find second-hand copies. It was the way. The rules, and various others, can be freely downloaded from the WRG website. http://www.wrg.me.uk/WRG.net/History/wrg.html
 |
| WRG 3rd edition with play sheet |
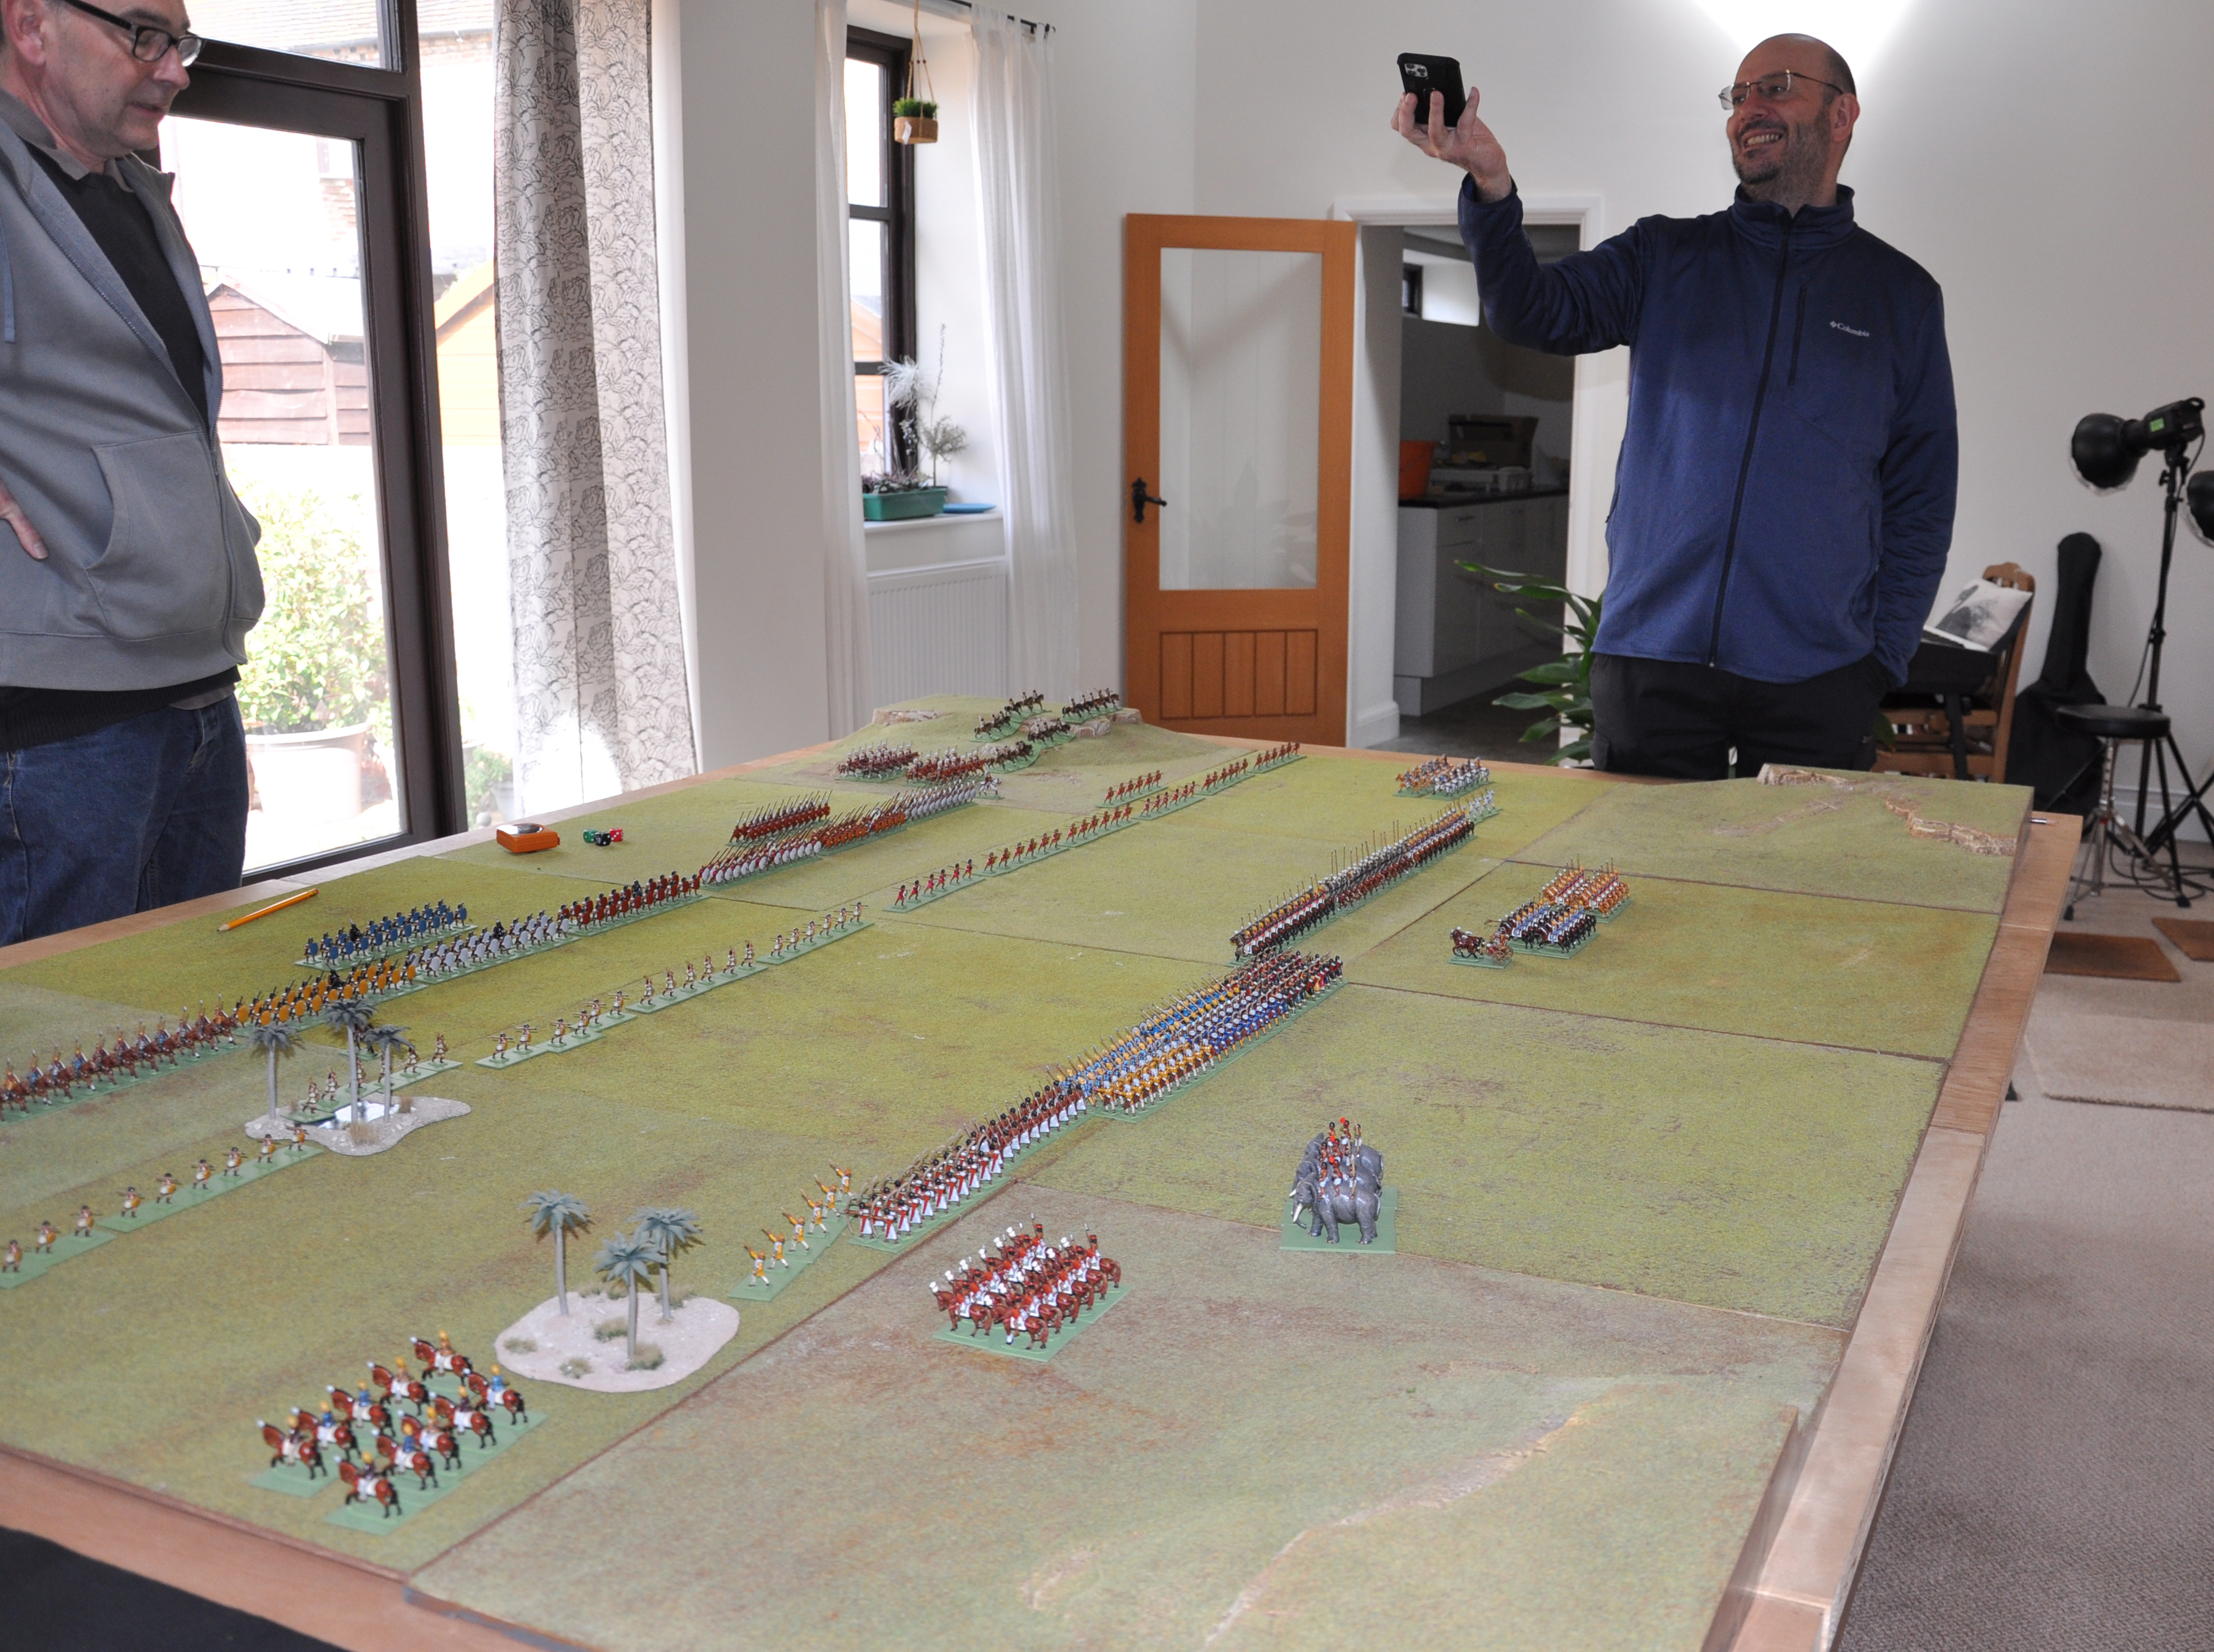
I worked out the opposing armies to more-or-less equal points values with the help of the 5th edition army lists. The total for both armies came out at about 2000 points excluding generals. This is somewhat larger than an average game would have been as I recall. We tended to play to 1000 points or up to 1200 if I remember correctly. I'm sure we played some much bigger games on occasion though. Jervis and I roped in Alessio Cavatore to share in the joy, and I put together a typical 1970s tabletop, i.e largely barren of terrain with a big open centre. I also prepared unit stat lists for each army with room for writing orders and recording casualties. Oh - and maps for indicating deployment. How we did love paperwork in our youth!
Given the size of my table (8ft wide 6ft deep) and the modest rate of knots achieved by a typical unit (they are over 50 years old so allowances must be made) we decided to deploy further into the table than we otherwise might. Splendiferous they look too! The first thing to notice is just how long the units are, with just a few skirmishers covering quite a large footprint, and even the fighting units having a relatively large frontage.
 |
| We are a turn in at this point with both armies advancing. |
Jervis, taking the Carthaginians, opted for a steady advance behind an extended skirmish line, with the cream of his fighting troops, namely his infantry spearmen, in the centre. The Persians, with myself and Alessio at the helm, made a geneal advance with a mass of infantry archers left of centre and cavalry right of centre. With our obvious advantage of firepower, we wanted to get within range as soon as possible.
 |
| Persian cavalry left of the line. |
 |
| Persians closing in on the Carthaginian lines. |
Both armies soon found themselves exchanging missiles, with the Persians having the advantage of longer range thanks to their massed 'medium' infantry archers. This gave us the opportunity to work out some shooting with the resultant 'reaction tests'. Modest casualties were inflicted upon the Carthaginian skirmishers sending some into retreat.
 |
| Cavalry go into action against those pesky skirmishers. |
The Persian cavalry advanced rapidly and managed to engage and largely upset the opposing skirmishers, routing several units and having a high old time of it. The Scythians were now busy entertaining some skirmishing infantry on the Persian right.
 |
| Scythians and skirmishers exchange missiles before the cavalry drive off the opposing infantry. |
On the Persian left the Carthaginian skirmishers enjoyed brief brief success, at first driving back the Persian cavalry thanks to a poor reaction test. Things soon sorted themselves out, however, with the skirmishers once more driven off or routed.
 |
| You're going the wrong way! Persian light cavalry forced into retreat by men with pointy sticks. |
 |
| The field looking twoards the Carthaginian right |
With the Persian infantry left facing the Carthaginian skirmish line, and the main Carthaginian lines somewhat lagging behind, the fighting was all on the Persian right. At this point we hit a bit of a brick wall with the rules. Although, the armies had barely clashed, it had taken most of the day to get thus far, and we felt we had had quite enough for our first session.
Now, you'd have thought with three professional games designers and getting on for 100 years of collective game design work behind us, we'd have coped easily enough with the rules. Boy, did we struggle. Even Jervis and I, who had played these very rules as lads, and later versions as young men, couldn't always figure it out. We were minded to think that the 'game' we played years ago was to a large extent governed by convention and mutual understanding. The rulebook certainly provides very little comfort when it comes to explaining how to go about things. Overall, the game felt slow and fiddly, with endless factors giving an impression of calculation and profundity, but results determined by dice throws in a fairly random manner. We had some very entertaining reaction test results, with three dice rolled being no respecters of averages, and even combats prone to luck in a manner that rather surprised us.
Both Jervis and I remarked upon how the simultaneous moves to orders, and seemingly non-existent turn sequencing, made the whole thing feel like a slow-motion computer simulation, with everything happening at the same time. Given when the game was devised, in a pre-computer age, that is perhaps understandable. Back then, a detail driven simulation - a ground up approach if you like - would have had a lot of appeal in terms of appearing to be 'worked out' from first principles. And, it cannot be denied that the game did look like an actual battle. However, the result is a very slow affair compared to modern rule sets, with complication at every level of play, and interactions often triggering further actions and yet more complication.
It was an interesting exercise, although not one either of us was especially keen to repeat anytime soon. I must admit, my overwhelming urge as I sat with the rulebook trying to relearn the rules before we played, was to re-write it! Unfortunately, I think there are some fundamentals that don't work terribly well, and which are mechanically very 'fragile'. The main issue is the order system with simultaneous actions. In successive editions of the rules, you can see the author (Phil Barker) struggling to re-define and formalise the whole order-writing process. The result is to pile on yet more regulation and complexity. Eventually, the affair would be abandoned in favour of the more structured DBA rules, which have enjoyed an even longer life than the original set remaining popular today.
The most serious casualty of the experience was poor Alessio, lacking both the cushioning effect of nostalgia and the certainty that the game had definately 'worked' in the past, he proved tragically susceptible to the ensuing horror. I won't say he began to shake and weep, but it was a close thing for sure.
For our second battle I resorted to a ruleset with which we are a bit more familiar - Hail Caesar - and a two-a side game with Dr Simon Elliott and Alan and Michael Perry. Next time I'll explain how we got on in Two Battles - part two.